
How to build an interactive company history timeline for your lobby
Turning 25, 50, or 100? A step-by-step plan for a touchscreen company history timeline, from finding old photos and naming eras to writing for a lobby and keeping it current after the anniversary.
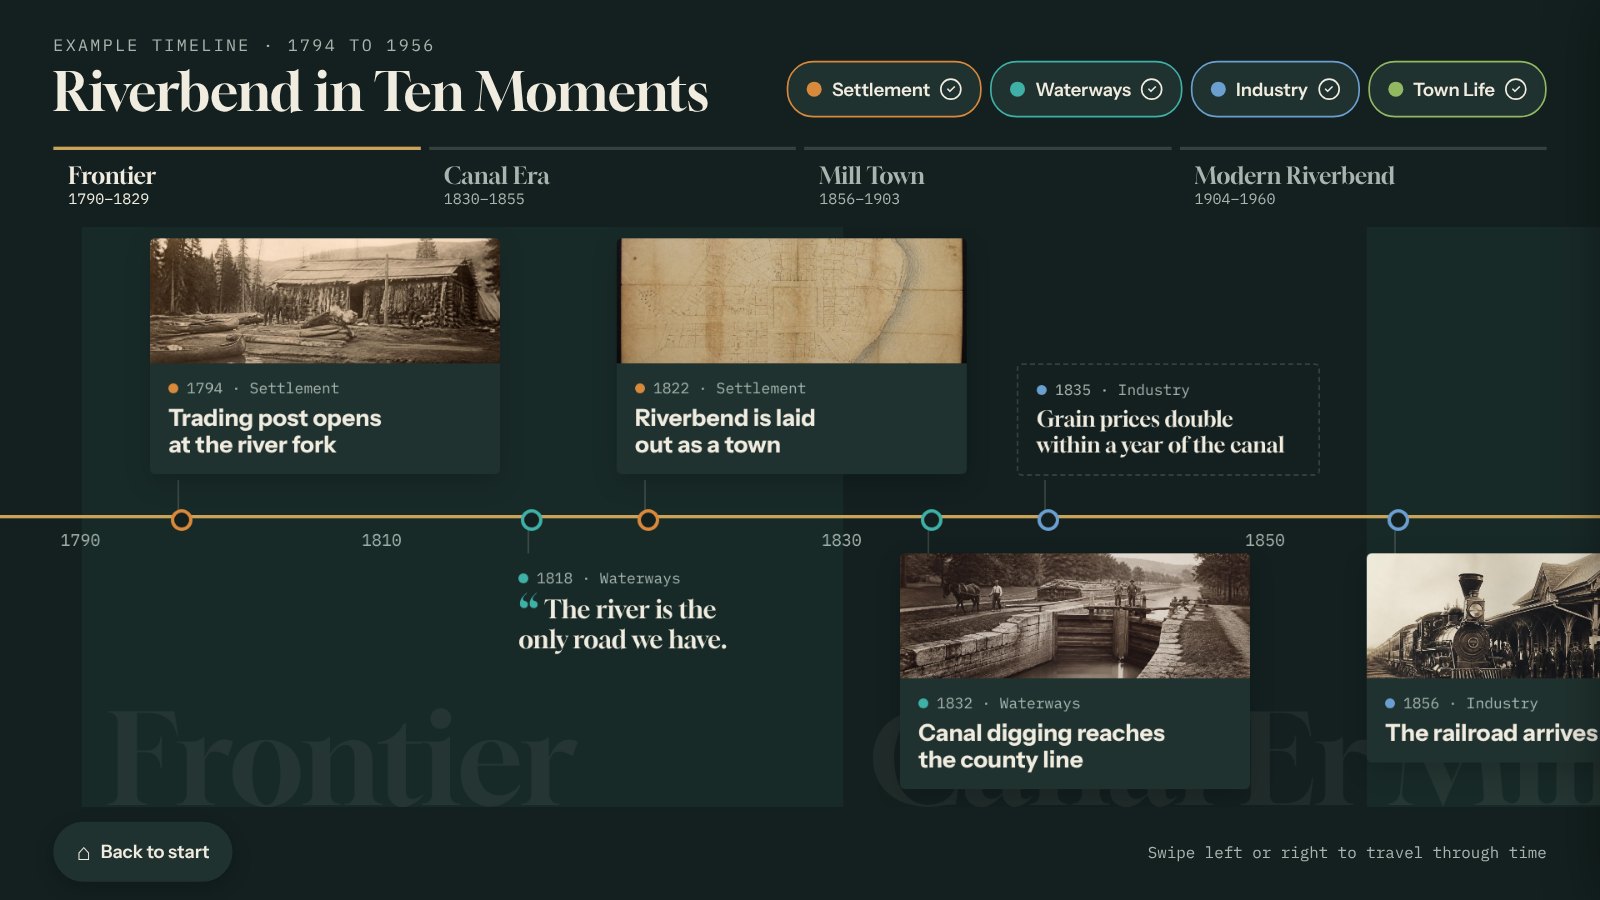
A company anniversary is the best excuse you’ll get to tell your story. A wall of framed photos says “we’ve been here a while.” A touchscreen timeline lets a visitor, a new hire, or a customer swipe back to the day you started, tap the moment they care about, and read the story behind it.
This guide walks through building one for a lobby, from finding the material to keeping it current after the party’s over. For more ways to use a lobby screen, see six lobby touchscreen ideas.
Why a touchscreen instead of a wall graphic
Printed history walls look great on opening day, then freeze. Every new milestone means a reprint, so most never get one. A touchscreen timeline fixes that:
- It keeps growing. Add a card when you open a new location or launch a product. No reprint.
- Visitors choose what to read. One person wants the founding story, another wants the product they used to own.
- It holds far more than a wall. Dozens of moments, each with several photos, a video, or a quote, in the space of one screen.
- It works in more than one place. The same timeline can play in the lobby and on your website.
Step 1: Decide what story you’re telling
Before you dig through boxes, write one sentence about what visitors should take away. For example:
- How a two-person repair shop became the region’s largest tool maker.
- Fifty years of building the bridges in this county.
- Why we still make it here.
Then decide who it’s for. Visitors waiting at reception, job candidates, customers on a plant tour, and employees at an anniversary event each care about different moments. You can serve all of them, but one sentence keeps the timeline from turning into a list of every date in the archive.
Step 2: Find the material
Most companies have more history than they think. It’s just scattered. Look in:
- Your own records: old annual reports, catalogs, price lists, newsletters, ads, and press clippings.
- Facilities and HR: building photos, groundbreaking shots, service award lists, and old employee directories.
- People: longtime employees and retirees. A 20-minute conversation often turns up the best story in the timeline, and the photos in someone’s desk drawer.
- The community: the local historical society or library often has photos of local businesses and buildings.
Check the rights as you go. Note who took each photo and whether you can use it. If a photo shows identifiable employees, current or former, it’s a good courtesy to ask them first, and your HR team may have a policy on it.
Step 3: Pick your moments and name your eras
Aim for 25 to 40 moments. Fewer feels thin, and many more is hard to explore standing up. Good candidates:
- The founding, and why it happened
- First product, first customer, first employee
- Moves, new buildings, and new locations
- Products that defined each decade
- Hard years, and how you got through them
- People who shaped the company
- Recent milestones, so it doesn’t stop in the past
Group them into four or five named eras, like “The garage years, 1962 to 1974” or “Going national, 1990 to 2005.” Visitors remember eras more than dates, and named eras let them jump straight to a period. Then add a few filters, such as Products, People, Places, and Milestones, so a visitor can follow one thread.
Step 4: Write for people standing in a lobby
Lobby visitors have a few minutes, not an afternoon. Keep each card short:
- A year and a short title that says what happened: “1974 · We outgrow the garage.”
- 40 to 80 words of story. Lead with the interesting part.
- One strong photo, with a credit line and a one-line description for visitors who can’t see it.
Mix in different kinds of cards. A quote card in the founder’s own words, or a bold fact like “1 million drills shipped,” breaks up the rhythm and gives people something to share. For more writing and layout detail, see how to build a touchscreen timeline exhibit.
Step 5: Make it look like your company
Your lobby is a brand space, so the timeline should match it:
- Add your logo and brand colors, and choose a card style that fits your other materials.
- Pick landscape or portrait to match the screen and the wall.
- Use real photos over stock. Visitors can tell, and your own grainy 1970s photo is more convincing than any stock image.
In Tellcase, you set these once on your organization’s Brand tab and preview the result before you publish. Every interactive you make picks them up.
Step 6: Put it where people actually wait
- Near the seating, not behind the reception desk. People explore while they wait.
- At a reachable height. Keep anything visitors touch between 15 and 48 inches off the floor, so wheelchair users can reach it. Here’s the full accessibility checklist.
- On a commercial touchscreen, 43 to 55 inches for most lobbies, run by a Mac mini, a Windows PC, or a BrightSign player.
If the lobby Wi-Fi is unreliable, that’s fine. The timeline keeps playing when the network drops, and it can run fully offline from files you copy over with a USB stick.
Step 7: Use it in more than one place
You’ve done the hard part, so get more out of it:
- On your website. Embed the same timeline on your About or anniversary page. Fix a date once and both places update.
- At the anniversary event. Put a second screen near the food. It’s a natural conversation starter.
- At career fairs and plant tours. Your history is part of why people want to work for you.
A three-month anniversary schedule
| When | What to do |
|---|---|
| 12 weeks out | Write your one-sentence story. Start gathering photos, records, and interviews. |
| 8 weeks out | Pick your 25 to 40 moments, name the eras, and choose filters. |
| 6 weeks out | Write the cards. Send them to whoever needs to approve them. |
| 3 weeks out | Build the timeline, add photos, and test it on the real screen with people who haven’t seen it. |
| 1 week out | Final fixes, then publish to the lobby and your website. |
Keep it going after the party
The anniversary is the launch, not the finish. Give the timeline one owner, usually in marketing or communications, and add a card whenever something worth telling happens. Typos and new milestones can be fixed from a phone, and the lobby screen waits for visitors to walk away before it updates.
Try it
Tap through a sample timeline on the live demo, then see how Tellcase works as lobby touchscreen software for your company history. The Timeline template comes with example content, so you can see how eras and filters work before you add your own. Plans start at $49 a month for one screen, with a 14-day free trial and no card needed.
Quick answers
What should a company history timeline include?
Pick 25 to 40 moments that explain how you got here, such as the founding, first products, key hires, new buildings, hard years, and recent milestones. Group them into four or five named eras so visitors can jump to a period, and add filters like Products, People, and Places.
How far ahead should we start an anniversary timeline?
About three months. Spend the first month finding photos and stories, the next month writing, and leave the last few weeks to build, test on the real screen, and get sign-off.
Where do we find old company photos?
Start with your own archives, old annual reports, catalogs, newsletters, and press clippings. Then ask longtime employees and retirees, and check the local historical society or library, which often hold photos of local businesses.
Can the same timeline go on our website?
Yes. A Tellcase interactive can be embedded on a web page, such as your About or anniversary page, so the lobby screen and the website show the same timeline and stay in sync.
Who should keep the timeline updated?
Give it one owner, usually in marketing or communications, and add a card whenever there's a milestone worth telling. A timeline that grows every year gives regular visitors a reason to look again.